Over the course of the many hours they spend in front of this amazing device, almost every computer user will find themselves in need of saving the screen content as a graphic. The process of creating an image of the monitor’s contents is what seasoned professionals call taking a screenshot.
As with so many things, there are many ways to achieve a screenshot. Some very resourceful people solve the problem by simply pointing their smartphone at the monitor and taking a photo. Why not? As long as you can still recognize something afterwards, everything’s fine. But this short guide doesn’t end there; we’ll take a closer look at the many ways to create screenshots. Even professionals who occasionally write instructions, for example, have to overcome one or two pitfalls.
Before we get to the nitty-gritty, it’s important to mention that it makes a difference whether you want to save the entire screen, the browser window, or even the invisible area of a website as a screenshot. The solution presented for the web browser works pretty much the same for all web browsers on all operating systems. Screenshots intended to cover the monitor area and not a web page use the technologies of the existing operating system. For this reason, we also differentiate between Linux and Windows. Let’s start with the most common scenario: browser screenshots.
Browser
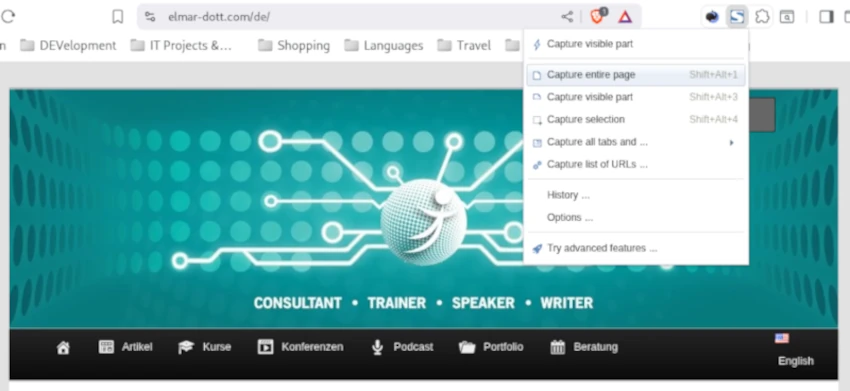
Especially when ordering online, many people feel more comfortable when they can additionally document their purchase with a screenshot. It’s also not uncommon to occasionally save instructions from a website for later use. When taking screenshots of websites, one often encounters the problem that a single page is longer than the area displayed on the monitor. Naturally, the goal is to save the entire content, not just the displayed area. For precisely this case, our only option is a browser plugin.
Fireshot is a plug-in available for all common browsers, such as Brave, Firefox, and Microsoft Edge, that allows us to create screenshots of websites, including hidden content. Fireshot is a browser extension that has been on the market for a very long time. Fireshot comes with a free version, which is already sufficient for the scenario described. Anyone who also needs an image editor when taking screenshots, for example, to highlight areas and add labels, can use the paid Pro version. The integrated editor has the advantage of significantly accelerating workflows in professional settings, such as when creating manuals and documentation. Of course, similar results can be achieved with an external photo editor like GIMP. GIMP is a free image editing program, similarly powerful and professional as the paid version of Photoshop, and is available for Windows and Linux.
Linux
If we want to take screenshots outside of the web browser, we can easily use the operating system’s built-in tools. In Linux, you don’t need to install any additional programs; everything you need is already there. Pressing the Print key on the keyboard opens the tool. You simply have to drag the mouse around the area you want to photograph and press Capture in the control field that appears. It’s not a problem if the control area is in the visible area of the screenshot; it won’t be shown in the screenshot. On German keyboards, you often find the Print key instead of Print. The finished screenshot then ends up in the Screenshots folder with a timestamp in the file name. This folder is a subfolder of Pictures in the user directory.
Windows
The easiest way to take screenshots in Windows is to use the Snipping Tool, which is usually included with your Windows installation. It’s also intuitive to use.
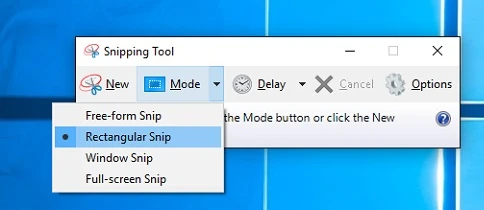
Another very old way in Windows, without a dedicated screenshot creation program, is to press the Ctrl and Print Screen keys simultaneously. Then, open a graphics program, such as Paint, which is included in every Windows installation. In the drawing area, press Ctrl + V simultaneously, and the screenshot appears and can be edited immediately.
These screenshots are usually created in JPG format. JPG is a lossy compression method, so you should check the readability after taking the screenshot. Especially with current monitors with resolutions around 2000 pixels, using the image on a website requires manual post-processing. One option is to reduce the resolution from just under 2000 pixels to the usual 1000 pixels on a website. Ideally, the scaled and edited graphic should be saved in the new WEBP format. WEBP is a lossless graphics compression method that further reduces the file size compared to JPG, which is very beneficial for website loading times.
This already covers a good range of possibilities for taking screenshots. Of course, more could be said about this, but that falls into the realm of graphic design and the efficient use of image editing software.


Leave a Reply
You must be logged in to post a comment.