
If you and your team are dealing with tools like Git or Subversion, you may need an administrative layer where you are able to manage user access and repositories in a comfortable way, because source control management systems (SCM) don’t bring this functionality out of the box.
Perhaps you are already familiar with popular management solutions like GitHub, GitBlit or GitLab. The main reason for their success is their huge functionality. And of course, if you plan to create your own build and deploy pipeline with an automation server like Jenkins you will need to host your own repository manager too.
As great as the usage of GitLab and other solutions is, there is also a little bitter taste:
- The administration is very complicated and requires some experience.
- The minimal requirement of hardware resources to operate those programs with good performance is not that little.
To overcome all these hurdles, I will introduce a new star on the toolmaker’s sky SCM-Manager [1]. Fast, compact, extendable and simple, are the main attributes I would use to describe it.
Kick Starter: Installation
Let’s have a quick look at how easy the installation is. For fast results, you can use the official Docker container [2]. All it takes is a short command:
docker run --name scm –restart=always \
-p 8080 -p 2222 \
-v /home/<user>/scmManager:/var/lib/scm \
scmmanager/scm-manager:2.22.0First, we create a container named scm based on the SCM-Manager image 2.22.0. Then, we tell the container to always restart when the host operating system is rebooted. Also, we open the ports 2222 and 8080 to make the service accessible. The last step is to mount a directory inside the container, where all configuration data and repositories are stored.
Another option to get the SCM-Manager running on a Linux server like Ubuntu is by using apt. The listing below shows how to do the installation.
echo 'deb [arch=all] https://packages.scm-manager.org/repository/apt-v2-releases/ stable main' | sudo tee /etc/apt/sources.list.d/scm-manager.list
sudo apt-key adv --recv-keys --keyserver hkps://keys.openpgp.org 0x975922F193B07D6E
sudo apt-get update
sudo apt-get install scm-serverSCM-Manager can also be installed on systems like Windows or Apple. You can find information about the installations on additional systems on the download page [3]. When you perform an installation, you will find a log entry with a startup token in the console.

After this you can open your browser and type localhost:8080, where you can finish the installation by creating the initial administration account. In this form, you need to paste the startup token from the command line, as it is shown in image 2. After you submitted the initialization form, you get redirected to the login. That’s all and done in less than 5 minutes.
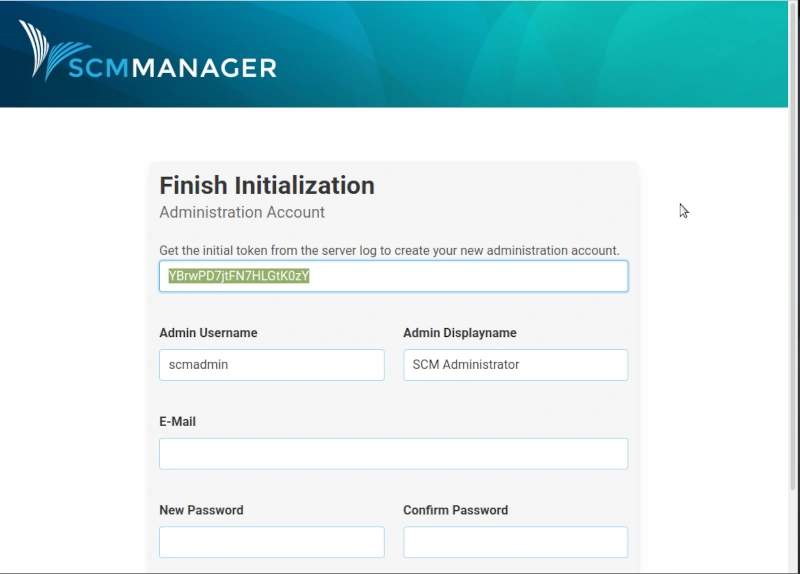
For full scripted untouched installations, there is also a way to bypass the Initialization form by using the system property scm.initalPassword. This creates a user named scmadmin with the given password.
In older versions of the SCM-Manager, the default login account was scmadmin with the password scmadmin. This old way is quite helpful but if the administrator doesn’t disable this account after the installation, there is a high-security risk. This security improvement is new since version 2.21.
Before we discover more together about the administration, let’s first get to some details about the SCM-Manager in general. SCM-Manager is open source under MIT license. This allows commercial usage. The Code is available on GitHub. The project started as research work. Since Version 2 the company Cloudogu took ownership of the codebase and manages the future development. This construct allows the offering of professional enterprise support for companies. Another nice detail is that the SCM-Manager is made in Germany.
Pimp Me Up: Plugins
One of the most exciting details of using the SCM-Manager is, that there is a simple possibility to extend the minimal installation with plugins to add more useful functions. But be careful, because the more plugins are installed, the more resources the SCM-Manager needs to be allocated. Every development team has different priorities and necessities, for this reason, I’m always a fan of customizing applications to my needs.
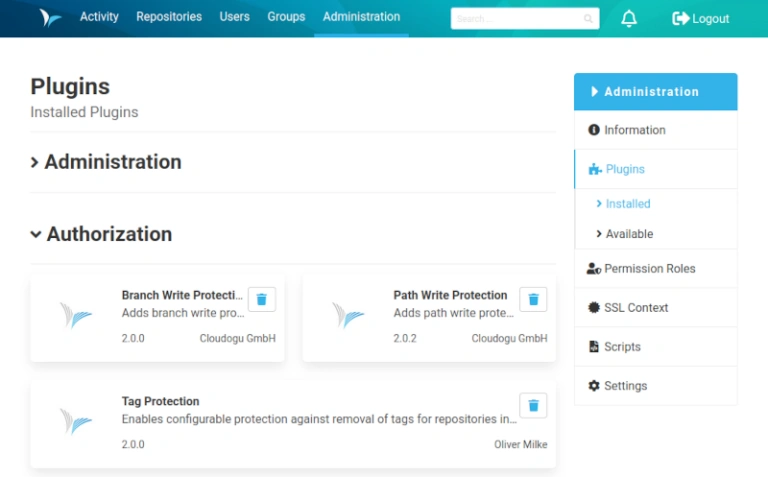
The plugin installation section is reachable by the Administration tab. If you can’t see this entry you don’t have administration privileges. In the menu on the right side, you find the entry Plugins. The plugin menu is divided into two sections: installed and available. For a better overview, the plugins are organized by categories like Administration, Authorization, or Workflow. The short description for each plugin is very precise and gives a good impression of what they do.
Some of the preinstalled plugins like in the category Source Code Management for supported repository types Git, Subversion, and Mercurial can’t be uninstalled.
Some of my favorite plugins are located in the authorization section:
- Path Write Protection, Branch Write Protection, and,
- Tag Protection.
Those features are the most convenient for Build- and Configuration Managers. The usage is also as simple as the installation. Let’s have a look at how it works and for what it’s necessary.
Gate Keeper: Special Permissions
Imagine, your team deals for example whit a Java/Maven project. Perhaps it exists a rule that only selected people should be allowed to change the content of the pom.xml build logic. This can be achieved with the Path Write Protection Plugin. Once it is installed, navigate to the code repository and select the entry Settings in the menu on the right side. Then click on the option Path Permissions and activate the checkbox.
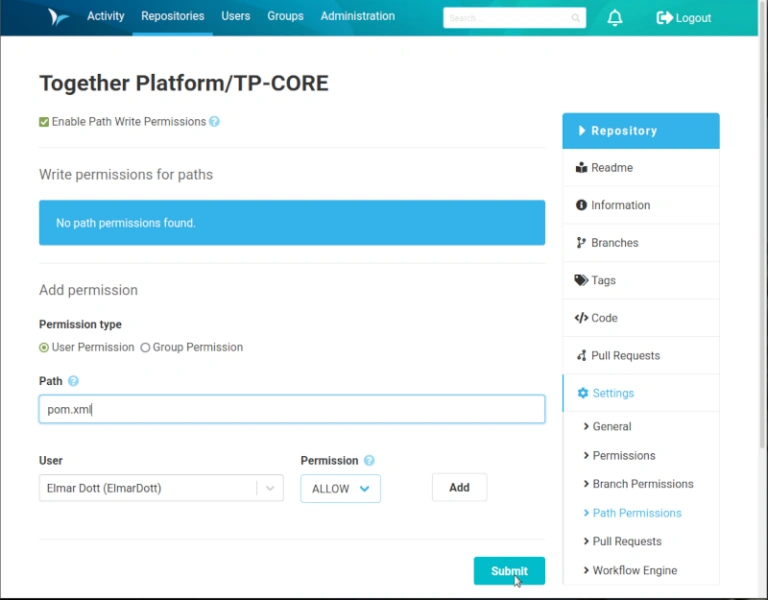
As you can see in image 4, I created a rule that only the user Elmar Dott is able to modify the pom.xml. The opposite permission is exclude (deny) the user. If the file or a path expression doesn’t exist, the rule cannot be created. Another important detail is, that this permission covers all existing branches. For easier administration, existing users can be organized into groups.
In the same way, you are able to protect branches against unwanted changes. A scenario you could need this option is when your team uses massive branches or the git-flow branch model. Also, personal developer branches could have only write permission for the developer who owns the branch or the release branch where the CI /CD pipeline is running has only permissions for the Configuration Management team members.
Let’s move ahead to another interesting feature, the review plugin. This plugin enables pull requests for your repositories. After installing the review plugin, a new bullet point in the menu of your repositories appears, it’s called Pull Requests.
Divide and Conquer: Pull Requests
On the right hand, pull requests [4] are a very powerful workflow. During my career, I often saw the misuse of pull requests, which led to drastically reduced productivity. For this reason, I would like to go deeper into the topic.
Originally, pull requests were designed for open source projects to ensure code quality. Another name for this paradigm is dictatorship workflow [5]. Every developer submits his changes to a repository and the repository owner decides which revision will be integrated into the codebase.
If you host your project sources on GitHub, strangers can’t just collaborate in your project, they first have to fork the repository into their own GitHub space. After they commit some revisions to this forked repository, they can create a pull request to the original repository. As repository owner, you can now decide whether you accept the pull request.
The SCM tool IBM Synergy had a similar strategy almost 20 years ago. The usage got too complicated so that many companies decided to move to other solutions. These days, it looks like history is repeating itself.
The reason why I’m skeptical about using pull requests is very pragmatic. I often observed in projects that the manager doesn’t trust the developers. Then he decides to implement the pull request workflow and makes the lead developer or the architect accept the pull requests. These people are usually too busy and can’t really check all details of each single pull request. Hence, their solution is to simply merge each pull request to the code base and check if the CI pipeline still works. This way, pull requests are just a waste of time.
There is another way how pull requests can really improve the code quality in the project: if they are used as a code review tool. How this is going to work, will fill another article. For now, we leave pull requests and move to the next topic about the creation of repositories.
Treasure Chest: Repository Management
The SCM-Manager combines three different source control management repository types: Git, Subversion (SVN), and Mercurial. You could think that nobody uses Subversion anymore, but keep in mind that many companies have to deal with legacy projects managed with SVN. A migration from those projects to other technologies may be too risky or simply expensive. Therefore, it is great to have a solution that can manage more than one repository type.
If you are Configuration Manager and have to deal with SVN, keep in mind that some things are a bit different. Subversion organizes branches and tags in directories. An SVN repository usually gets initialized with the folders:
- trunk — like the master branch in Git.
- branches — references to revisions in the trunk were forked code changes can committed.
- tags — like branches without new code revisions.
In Git you don’t need this folder structure, because how branches are organized is completely different. Git (and Mercurial) compared to Subversion is a distributed Source Control Management System and branches are lose coupled and can easily be deleted if they are obsolete. As of now, I don’t want to get lost in the basics of Source Control Management and jump to the next interesting SCM-Manager plugins.
Uncover Secrets
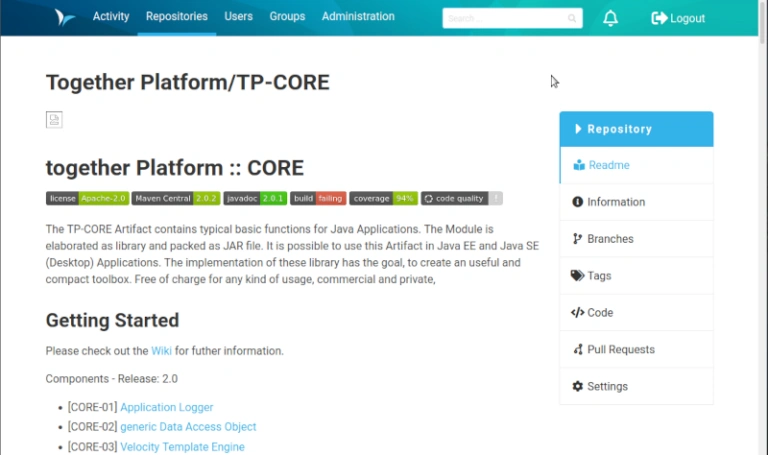
If a readme.md file is located in the root folder of your project, you could be interested in the readme plugin. Once this plugin is activated and you navigate into your repository the readme.md file will be rendered in HTML and displayed.
If you wish to have a readable visualization of the repository’s activities, the activity plugin could be interesting for you. It creates a navigation entry in the header menu called Activity. There you can see all commit log entries and you can enter into a detailed view of the selected revision.
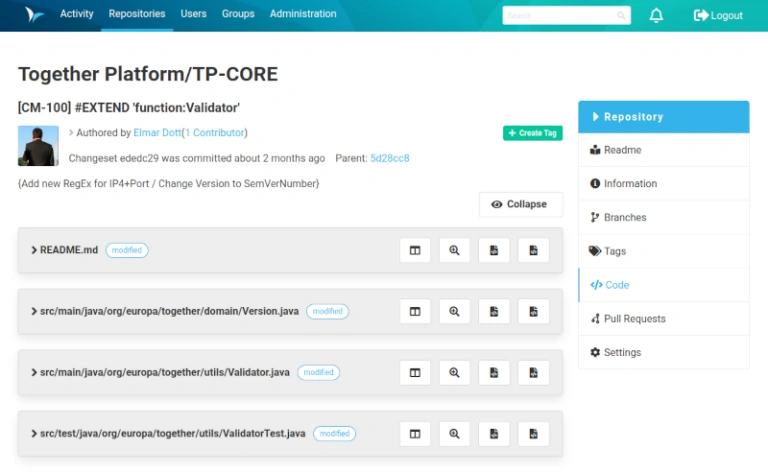
This view also contains a compare and history browser, just like clients as TortoiseGit does.
The Repository Manager includes many more interesting details for the daily work. There is even a code editor, which allows you to modify files directly in the SCM-Manger user interface.
Next, we will have a short walk through the user management and user roles.
Staffing Office: User and Group Management
Creating new users is like almost every activity of the SCM-Manager a simple thing. Just switch to the Users tab and press the create user button. Once you have filled out the form and saved it, you will be brought back to the Users overview.
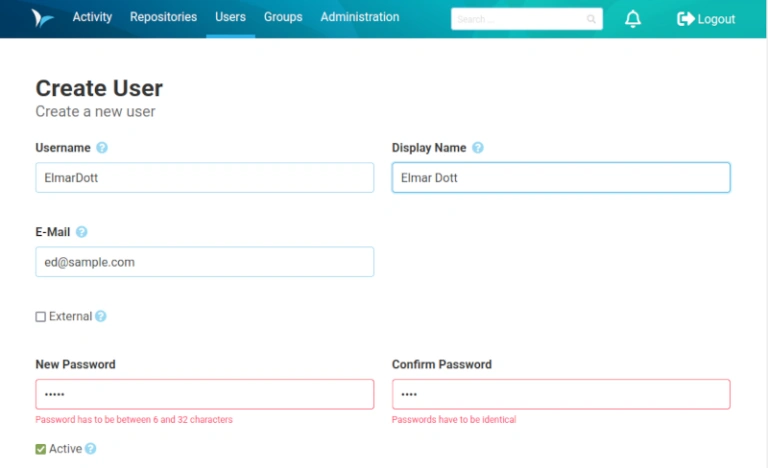
Here you can already see the newly created user. After this step, you will need to administrate the user’s permissions, because as of now it doesn’t have any privileges. To change that just click on the name of the newly created user. On the user’s detail page, you need to select the menu entry Settings on the right side. Now choose the new entry named Permissions. Here you can select from all available permissions the ones you need for the created account. Once this is done and you saved your changes, you can log out and log in with your new user, to see if your activity was a success.
If you need to manage a massive number of users it’s a good idea to organize them into groups. That means after a new user is created the permissions inside the user settings will not be touched and stay empty. Group permissions can be managed through the Groups menu entry in the header navigation. Create a new group and select Permission from the right menu. This configuration form is the same as the one of the user management. If you wish to add existing users to a group switch to the point General. In the text field Members, you can search for an existing user. If the right one is selected you need to press the Add Member button. After this, you need to submit the form and all changes are saved and the new permissions got applied.
To have full flexibility, it is allowed to add users to several groups (roles). If you plan to manage the SCM-Manager users by group permissions, be aware not to combine too many groups because then users could inherit rights you didn’t intend to give them. Currently, there is no compact overview to see in which groups a user is listed and which permissions are inherited by those groups. I’m quite sure in some of the future versions of the SCM-Manager this detail will be improved.
Besides the internal SCM-Manager user management exist some plugins where you are able to connect the application with LDAP.
Lessons Learned
If you dared to wish for a simpler life in the DevOps world, maybe your wish became true. The SCM-Manager could be your best friend. The application offers a lot of functionality that I briefly described here, but there are even more advanced features that I haven’t even mentioned in this short introduction: There is a possibility to create scripts and execute them with the SCM-Manager API. Also, a plugin for the Jenkins automation server is available. Other infrastructure tools like Jira, Timescale, or Prometheus metrics gathering have an integration to the SCM-Manager.
I hope that with this little article I was able to whet your appetite for this exciting tool and I hope you enjoy trying it out.
Leave a Reply
You must be logged in to post a comment.