Apache Maven (Maven for short) was first released on March 30, 2002, as an Apache Top-Level Project under the free Apache 2.0 License. This license also allows free use by companies in a commercial environment without paying license fees.
The word Maven comes from Yiddish and means something like “collector of knowledge.”
Maven is a pure command-line program developed in the Java programming language. It belongs to the category of build tools and is primarily used in Java software development projects. In the official documentation, Maven describes itself as a project management tool, as its functions extend far beyond creating (compiling) binary executable artifacts from source code. Maven can be used to generate quality analyses of program code and API documentation, to name just a few of its diverse applications.
This online course is suitable for both beginners with no prior knowledge and experienced experts. Each lesson is self-contained and can be individually selected. Extensive supplementary material explains concepts and is supported by numerous references. This allows you to use the Apache Maven Master Class course as a reference. New content is continually being added to the course. If you choose to become an Apache Maven Master Class member, you will also have full access to exclusive content.
Developer
Maven Basics
Maven on the Command Line
IDE Integration
Archetypes: Creating Project Structures
Test Integration (TDD & BDD) with Maven
Test Containers with Maven
Multi-Module Projects for Microservices
Build Manager / DevOps
Release Management with Maven
Deploy to Maven Central
Sonatype Nexus Repository Manager
Maven Docker Container
Creating Docker Images with Maven
Encrypted Passwords
Process & Build Optimization
Quality Manager
Maven Site – The Reporting Engine
Determine and evaluate test coverage
Static code analysis
Review coding style specifications
In-Person Live Training – Build Management with Apache Maven
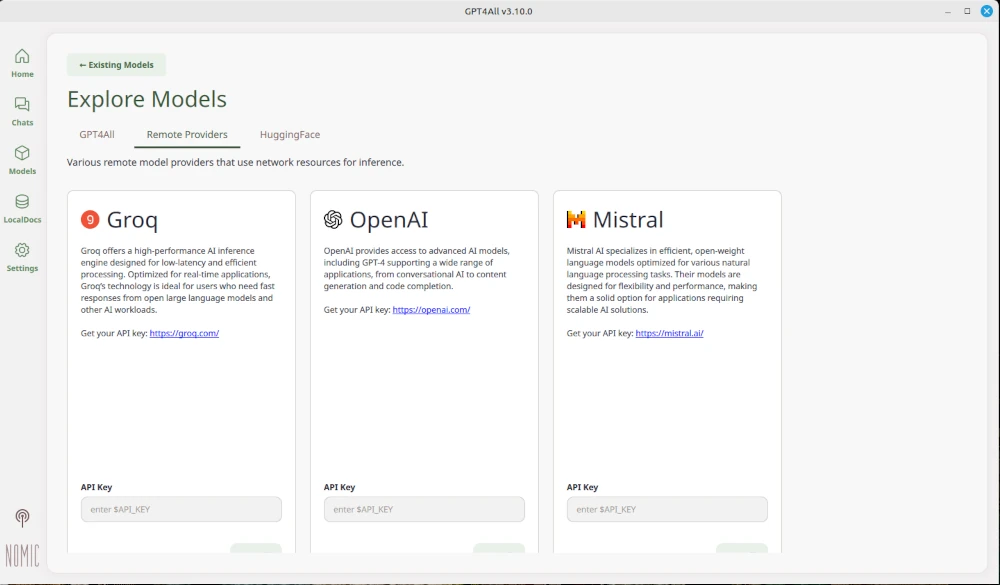
We already have a guide with GPT4all on how to run your own local LLM. Unfortunately, the previous solution has a small limitation. It cannot process documents such as PDFs. In this new workshop, we will install AnythingLLM with Ollama to be able to analyze documents.
The minimum requirement for this workshop is a computer with 16 GB of RAM, ideally with Linux (Mint, Ubuntu, or Debian) installed. With a few adjustments, this guide can also be followed on Windows and Apple computers. The lower the hardware resources, the longer the response times.
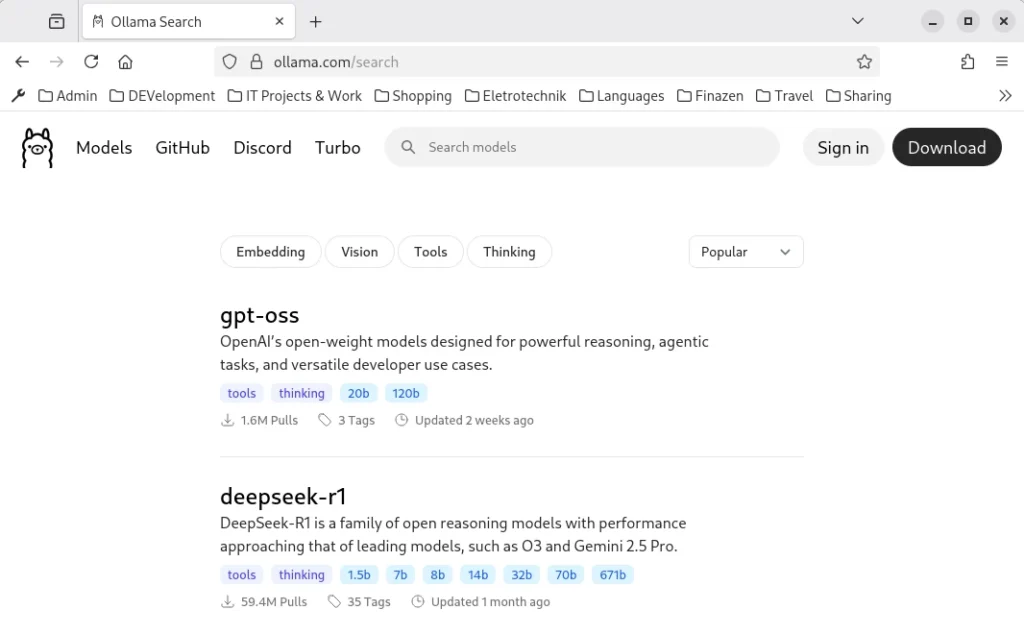
Let’s start with the first step and install Ollama. To do this, open Bash and use the following command: sudo curl -fsSL https://ollama.com/install.sh | sh. This command downloads Ollama and executes the installation script. For the installation to begin, you must enter the administrator password. Ollama is a command-line program that is controlled via the console. After successful installation, a language model must be loaded. Corresponding models can be found on the website https://ollama.com/search.
Proven language models include:
lama 3.1 8B: Powerful for more demanding applications.
Phi-3-5 3B: Well-suited for logical reasoning and multilingualism.
Llama 3.3 2B: Efficient for applications with limited resources.
Phi 4 14B: State-of-the-art model with increased hardware requirements but performance comparable to significantly larger models.
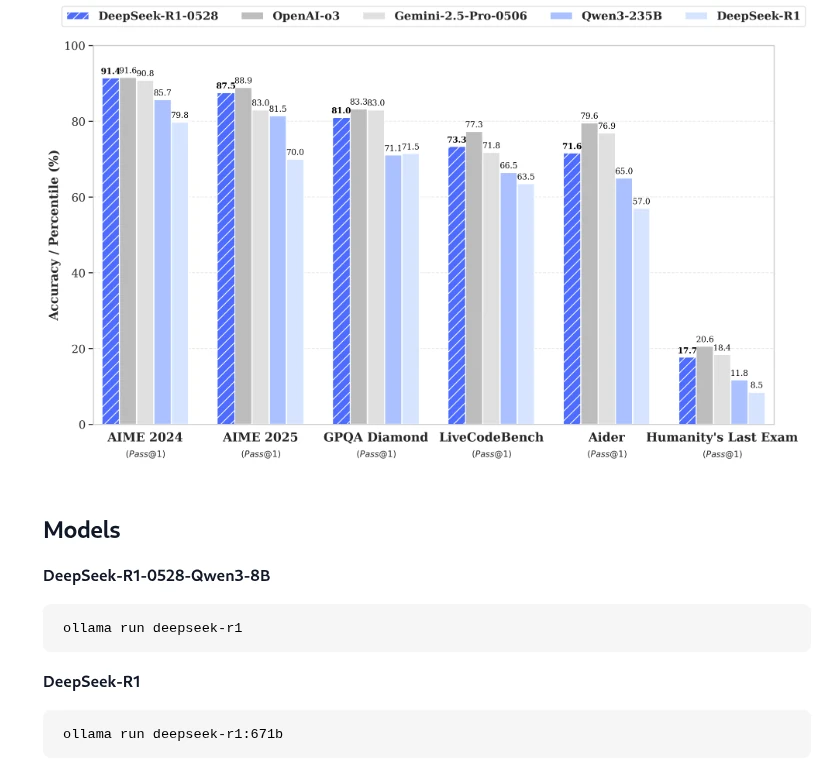
Once you’ve chosen a language model, you can copy the corresponding command from the overview and enter it into the terminal. For our example, this will be DeepSeek R1 for demonstration purposes.
As shown in the screenshot, the corresponding command we need to install the model locally in Ollama is: ollama run deepseek-r1. Installing the language model may take some time, depending on your internet connection and computer speed. Once the model has been installed locally in Ollama, we can close the terminal and move on to the next step: installing AnythingLLM.
Installing AnythingLLm is similar to installing Ollama. To do so, open the terminal and enter the following command: curl -fsSL https://cdn.anythingllm.com/latest/installer.sh | sh. Once the installation is complete, you can change to the installation directory, which is usually /home//AnythingLLMDesktop. There, navigate to the start link and make it executable (right-click and select Properties). Additionally, you can create a shortcut on the desktop. Now you can conveniently launch AnythingLLM from the desktop, which we’ll do right now.
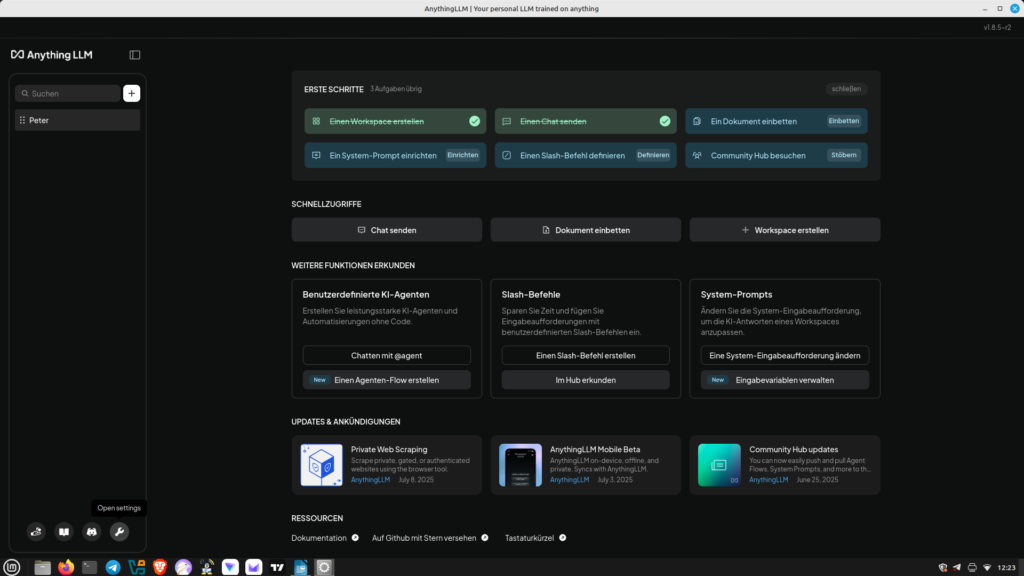
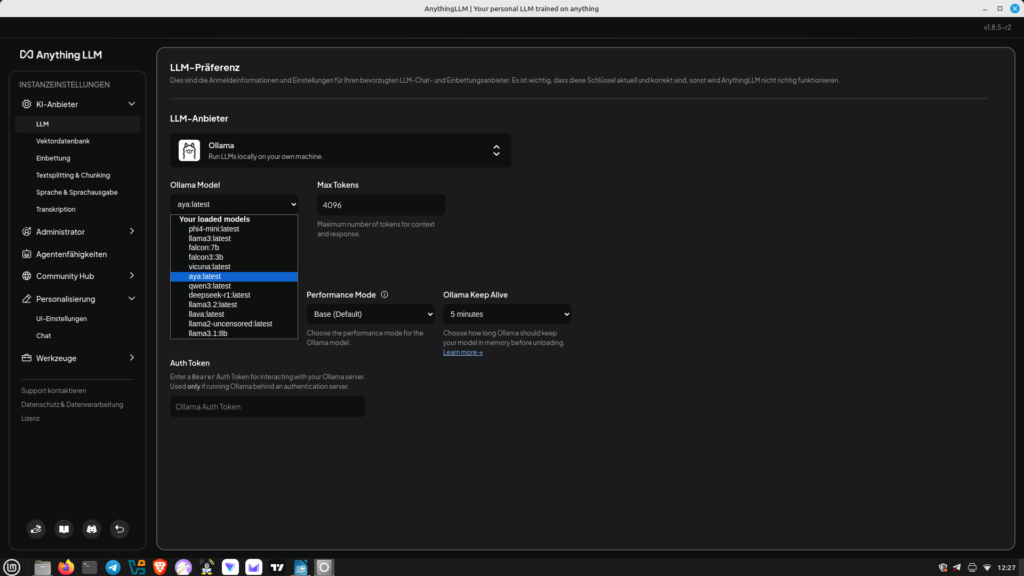
After defining the workspace, we can now link Anything with Ollama. To do this, we go to the small wrench icon (Settings) in the lower left corner. There, we select LLM and then Ollama. We can now select the language model stored for Ollama. Save our settings. Now you can switch to chat mode. Of course, you can change the language model at any time. Unlike previous workshops, we can now upload PDF documents and ask questions about the content. Have fun.
Artificial intelligence is a very broad field in which it’s easy to lose track. Large Language Models (LLMs), such as ChatGPD, process natural language and can solve various problems depending on the data set. In addition to pleasant conversations, which can be quite therapeutic, LLM can also handle quite complex tasks. One such scenario would be drafting official letters. In this article, we won’t discuss how you can use AI, but we’ll explain how you can install your own AI locally on your computer.
Before we get into the nitty-gritty, we’ll answer the question of what the whole thing is actually useful for. You can easily access AI systems, some of which are available online for free.
What many people aren’t aware of is that all requests sent to ChatGPT, DeepSeek, and the like are logged and permanently stored. We can’t answer the details of this logging, but the IP address and user account with the prompt request are likely among the minimal data collected. However, if you have installed your own AI on your local computer, this information will not be transmitted to the internet. Furthermore, you can interact with the AI as often as you like without incurring any fees.
For our project of installing our own artificial intelligence on your own Linux computer, we don’t need any fancy hardware. A standard computer is perfectly sufficient. As mentioned before, we are using Linux as the operating system because it is much more resource-efficient than Windows 10 or Windows 11. Any Debian-derived Linux can be used for the workshop. Debian derivatives include Ubuntu and Linux Mint.
At least 16 GB of RAM is required. The more RAM, the better. This will make the AI run much more smoothly. The CPU should be at least a current i5/i7 or AMD Ryzen 5+. If you also have an SSD with 1 TB of storage, we have the necessary setup complete. Computers/laptops with this specification can be purchased used for very little money. Without wanting to advertise too much, you can browse the used Lenovo ThinkPad laptops. Other manufacturers with the minimum hardware requirements also provide good services.
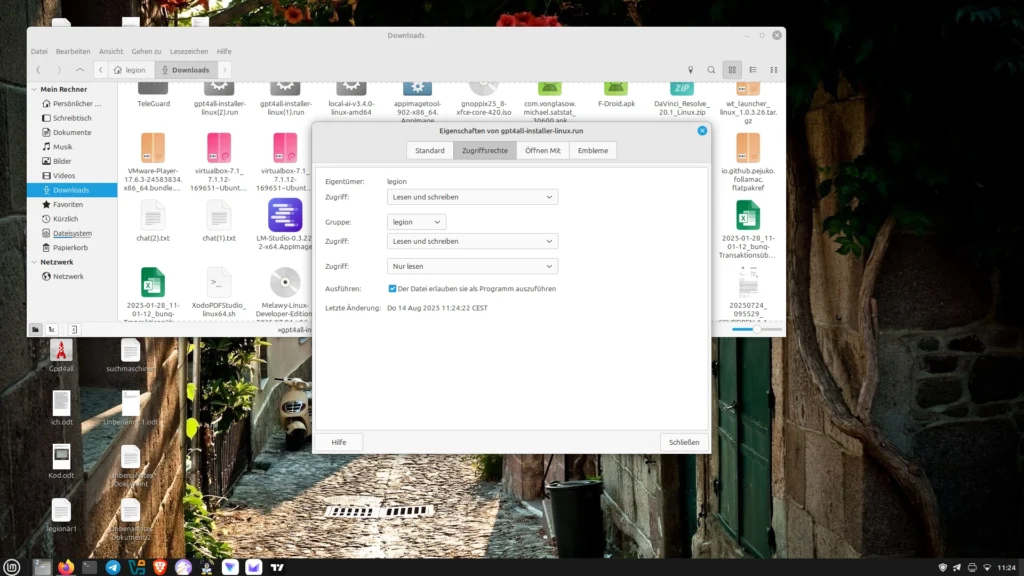
After clarifying the necessary requirements, we’ll first install GPT4all on our computer. Don’t worry, it’s quite easy, even for beginners. No special prior knowledge is necessary. Let’s start by downloading the gpd4all.run file from the homepage (https://gpt4all.io/index.html?ref=top-ai-list). Once this is done, we’ll make the file executable.
As shown in the screenshot, we right-click on the downloaded file and select Properties from the menu. Under the Permissions tab, we then check the Execute box. Now you can run the file with the usual double-click, which we do immediately.
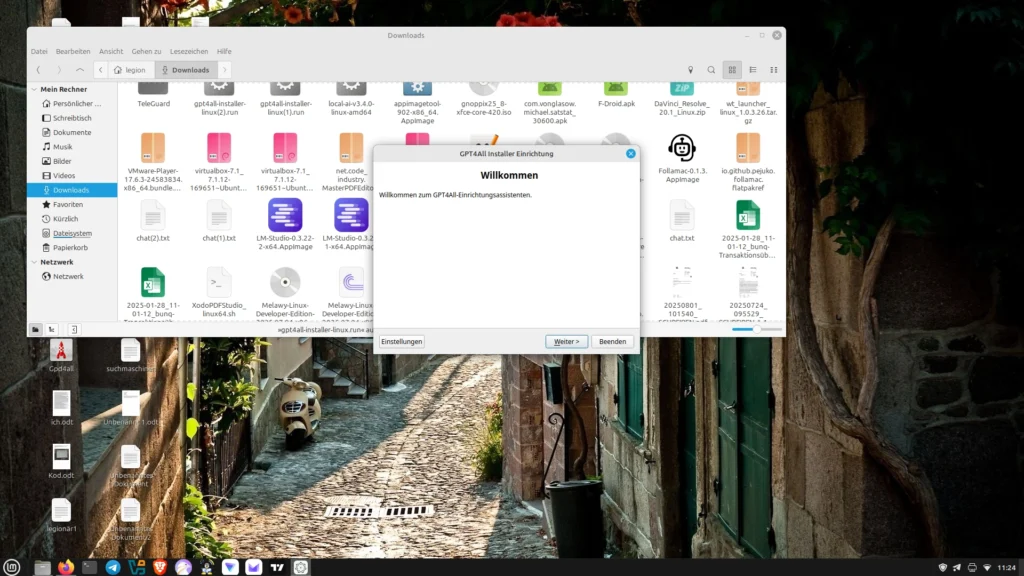
Now the installation process begins, where we can, among other things, select where GPT4all will be installed. On Linux, self-installed programs usually go to the /opt directory.
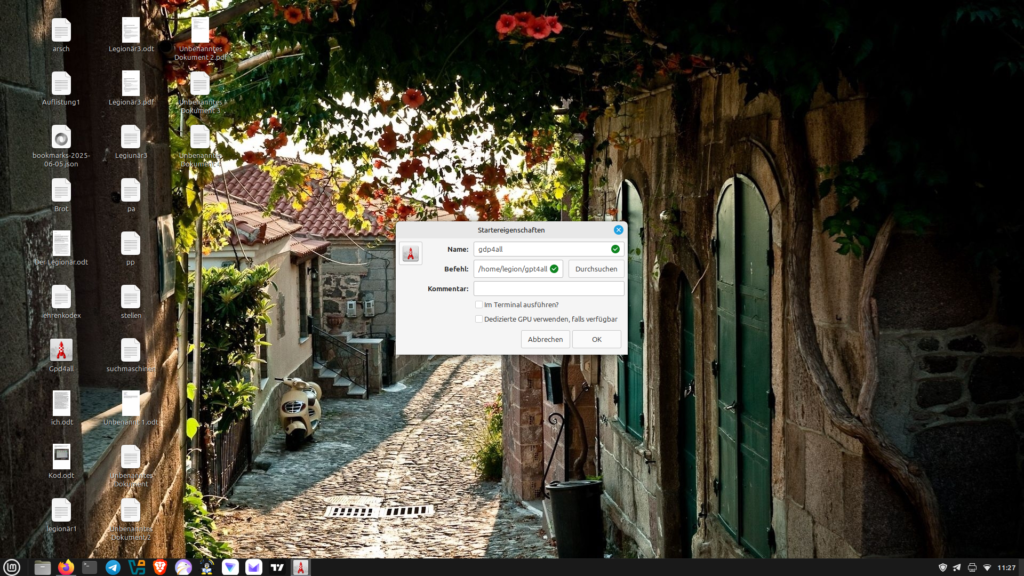
In the next step, we can create a desktop shortcut. To do this, right-click on the empty desktop and select “Create Shortcut.” In the pop-up window, enter a name for the shortcut (e.g., GPT 4 all) and set the path to the executable file (bin/chat), then click OK. Now we can conveniently launch GPT4all from our desktop.
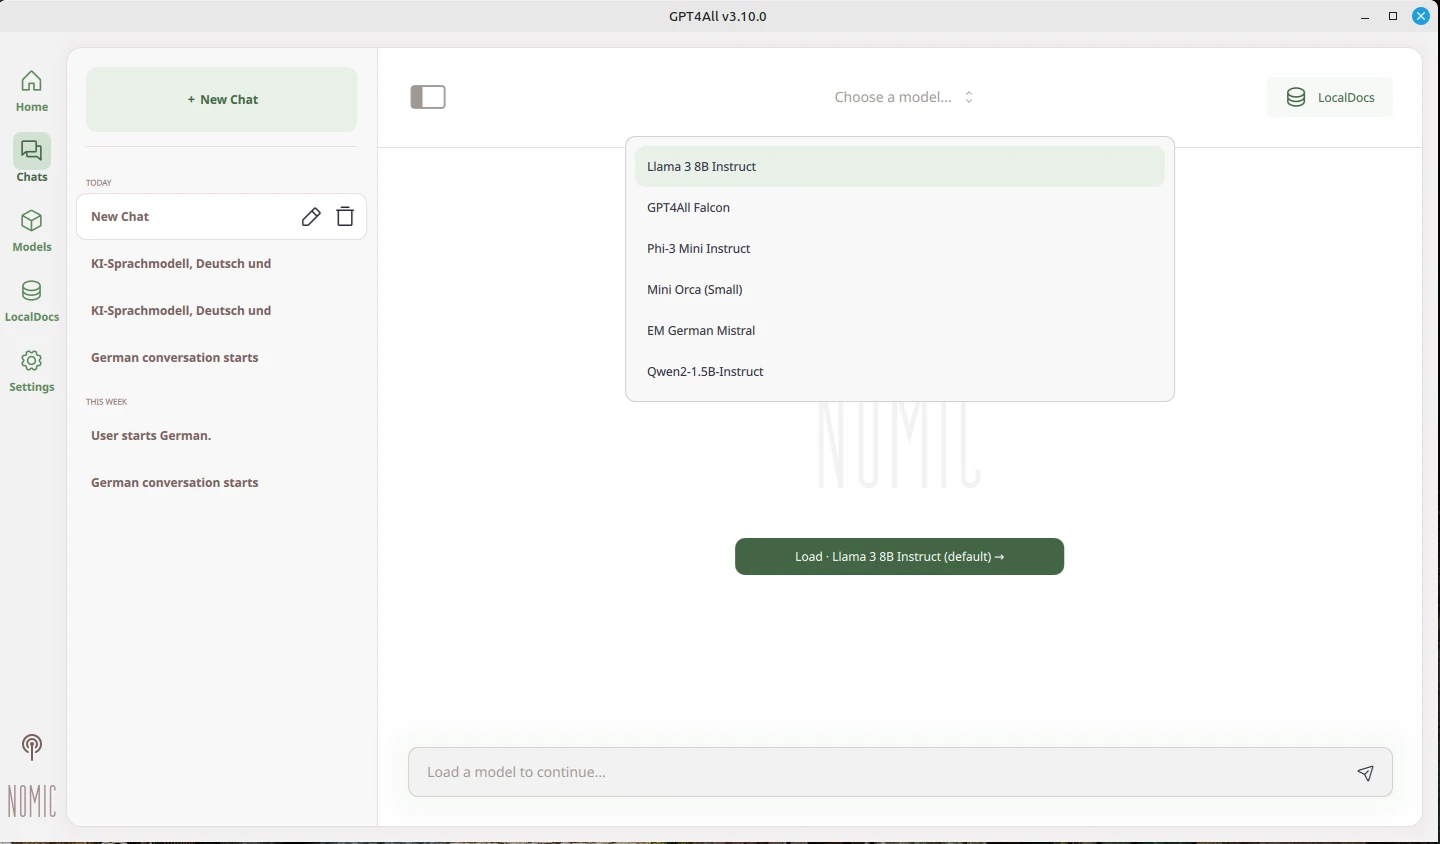
For GPT4all to work, a model must be loaded. As you can see in the screenshots, several models are available. The model must be reselected each time the program is started. The AI can now be used locally on your computer.
Image gallery:
Other AI systems include:
Llama 3 8B Instruct: an all-rounder with good language skills
Mistral 7B: efficient, fast, and precise
Phi 3 Mini: very small and runs even with little RAM
Developers are regularly faced with the task of checking user input for accuracy. A considerable number of standardized data formats now exist that make such validation tasks easy to master. The International Standard Book Number, or ISBN for short, is one such data format. ISBN comes in two versions: a ten-digit and a 13-digit version. From 1970 to 2006, the ten-digit version of the ISBN was used (ISBN-10), which was replaced by the 13-digit version (ISBN-13) in January 2007. Nowadays, it is common practice for many publishers to provide both versions of the ISBN for titles. It is common knowledge that books can be uniquely identified using this number. This, of course, also means that these numbers are unique. No two different books have the same ISBN (Figure 1).
The theoretical background for determining whether a sequence of numbers is correct comes from coding theory. Therefore, if you would like to delve deeper into the mathematical background of error-detecting and error-correcting codes, we recommend the book “Coding Theory” by Ralph Hardo Schulz [1]. It teaches, for example, how error correction works on compact disks (CDs). But don’t worry, we’ll reduce the necessary mathematics to a minimum in this short workshop.
The ISBN is an error-detecting code. Therefore, we can’t automatically correct a detected error. We only know that something is wrong, but we don’t know the specific error. So let’s get a little closer to the matter.
Why exactly 13 digits were agreed upon for ISBN-13 remains speculation. At least the developers weren’t influenced by any superstition. The big secret behind validation is the determination of the residual classes [2]. The algorithms for ISBN-10 and ISBN-13 are quite similar. So let’s start with the older standard, ISBN-10, which is calculated as follows:
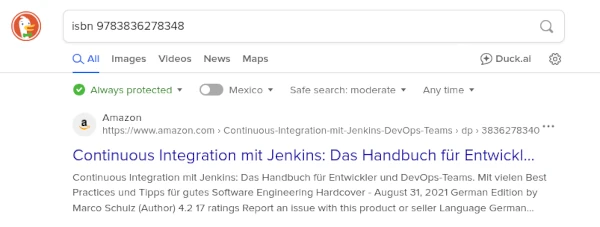
Don’t worry, you don’t have to be a SpaceX rocket engineer to understand the formula above. We’ll lift the veil of confusion with a small example for ISBN 3836278340. This results in the following calculation:
The last digit of the ISBN is the check digit. In the example given, this is 0. To obtain this check digit, we multiply each digit by its value. This means that the fourth position is a 6, so we calculate 4 * 6. We repeat this for all positions and add the individual results together. This gives us the amount 220. The 220 is divided by 11 using the remainder operation modulo 11. Since 11 fits exactly 20 times into 220, there is a remainder of zero. The result of 220 modulo 11 is 0 and matches the check digit, which tells us that we have a valid ISBN-10.
However, there is one special feature to note. Sometimes the last digit of the ISBN ends with X. In this case, the X must be replaced with 10.
As you can see, the algorithm is very simple and can easily be implemented using a simple for loop.
boolean success = false;
int[] isbn;
int sum = 0;

for(i=0; i<10; i++) {
    sum += i*isbn[i];
}

if(sum%11 == 0) {
    success = true;
}
To keep the algorithm as simple as possible, each digit of the ISBN-10 number is stored in an integer array. Based on this preparation, it is only necessary to iterate through the array. If the sum check using the modulo 11 then returns 0, everything is fine.
To properly test the function, two test cases are required. The first test checks whether an ISBN is correctly recognized. The second test checks for so-called false positives. This provokes an expected error with an incorrect ISBN. This can be quickly accomplished by changing any digit of a valid ISBN.
Our ISBN-10 validator still has one minor flaw. Digit sequences that are shorter or longer than 10, i.e., do not conform to the expected format, could be rejected beforehand. The reason for this can be seen in the example: The last digit of the ISBN-10 is a 0 – thus, the character result is also 0. If the last digit is forgotten and a check for the correct format isn’t performed, the error won’t be detected. Something that has no effect on the algorithm, but is very helpful as feedback for user input, is to gray out the input field and disable the submit button until the correct ISBN format has been entered.
As with ISBN-10, xn represents the numerical value at the corresponding position in the ISBN-13. Here, too, the partial results are summed and divided by a modulo. The main difference is that only the even-numbered positions—positions 2, 4, 6, 8, 10, and 12—are multiplied by 3, and the result is then divided by modulo 10. As an example, we calculate the ISBN-13: 9783836278348.
The algorithm can also be implemented for the ISBN-13 in a simple for loop.
boolean success = false;
int[] isbn;
int sum = 0;

for(i=0; i<13; i++) {
    if(i%2 == 0) {
        sum += 3*isbn[i];
    } else {
        sum += isbn[i];
    }
}

if(sum%10 == 0) {
    success = true;
}
The two code examples for ISBN-10 and ISBN-13 differ primarily in the if condition. The expression i % 2 calculates the modulo value 2 for the respective iteration. If the result is 0 at this point, it means it is an even number. The corresponding value must then be multiplied by 3.
This shows how useful the modulo operation % can be for programming. To keep the implementation as compact as possible, the so-called triple operator can be used instead of the if-else condition. The expression sum += (i%2) ? isbn[i] : 3 * isbn[3] is much more compact, but also more difficult to understand.
Below you will find a fully implemented class for checking the ISBN in the programming languages: Java, PHP, and C#.
While the solutions presented in the examples all share the same core approach, they differ in more than just syntactical details. The Java version, for example, offers a more comprehensive variant that distinguishes more generically between ISBN-10 and ISBN-13. This demonstrates that there are many ways to Rome. It also aims to show less experienced developers different approaches and encourage them to make their own adaptations. To simplify understanding, the source code has been enriched with comments. PHP, as an untyped language, eliminates the need to convert strings to numbers. Instead, a RegEx function is used to ensure that the entered characters are type-safe.
Lessons Learned
As you can see, verifying whether an ISBN is correct isn’t rocket science. The topic of validating user input is, of course, much broader. Other examples include credit card numbers. But regular expressions also provide valuable services in this context.
Ressourcen
[1] Ralph-Hardo Schulz, Codierungstheorie: Eine Einführung, 2003, ISBN 978-3-528-16419-5
[2] Concept of modular aritmetic on Wikipedia, https://en.wikipedia.org/wiki/Modular_arithmetic
If you want to use your Git repository for collaborative editing of source code, you need a Git server. The Git server enables multiple developers to collaborate on the same code base. Installing the Git client on a Linux server is a first step towards your own server solution, but it is far from sufficient. In order to allow multiple people to access a code repository, we need access authorization. After all, the repository should be publicly accessible via the Internet. We want to use user management to prevent unauthorized people from reading and changing the contents of the repositories.
There are many excellent and convenient solutions for operating a Git server that should be preferred to a native server solution. The administration of a native Git server requires Linux knowledge and is carried out exclusively via the command line. Solutions such as the SCM-Manager have a graphical user interface and come with many useful tools for administering the server. These tools are not available with a native installation.
Why should you install Git as a native server? This question is quite easy to answer. The reason is when the server on which the code repository is to be made available has only a few hardware resources. RAM in particular is always a bit of a problem in this context. This is often the case with rented virtual private servers (VPS) or a small RaspberryPI. So we can see that it can make sense to want to run a native Git server.
As a prerequisite, we need a Linux server on which we can install the Git server. This can be a Debian or Ubuntu server. If you use CentOs or other Linux distributions, you must use your distribution’s package manager instead of APT to install the software.
In the first step, we start by updating the packages and installing the Git client.
Now, in the third step, we can create our Git repositories in the newly created home directory of the git user. These differ from the local workspace in that they do not have the source code checked out.
Unfortunately, we are not quite finished with our project yet. In the fourth step, we have to set the user authorization for the created repository. This is done by storing the public key on the Git server for SSH access. To do this, we copy the contents of our private key file into the /home/git/.ssh/authorized_keys file in a separate line. If you now want to deny existing users access, simply comment out the private key number with a #.
If everything has been done correctly, you can access the repository using the following command line command: git clone ssh://git@<IP>/~/<repo>
Replace with the actual server IP. For our example, the correct path for is project.git, so it is the directory we created for the Git repository.
Multiple repositories can be created on the native Git server. It is important to note that all authorized users have read and write access to all repositories created in this way. This can only be restricted by creating multiple users on the operating system of the Linux server that provides our Git repositories, to whom the repositories are then assigned.
We see that a native Git server installation can be implemented quickly, but it is not sufficient for commercial software development. If you like to experiment, you can create a virtual machine and try out this workshop in it.
Ruby has been a well-established programming language for many years and can also be recommended to beginners. Ruby follows the object-oriented paradigm and contains many concepts to support OOP well. In addition, the Ruby on Rails framework makes it very easy to develop complex web applications.
The most difficult hurdle to overcome when getting started with Ruby is the installation of the entire development environment. For this reason, I have written this short tutorial on getting started with Ruby. So let’s start with the installation right away.
My operating system is a Debian 12 Linux and Ruby can be installed very easily with the sudo apt-get install ruby-full command. This procedure can be applied to all Debian-based Linux distributions such as Ubuntu. You can then use ruby -v to check the success in the bash.
If we now follow the tutorial on the Ruby on Rails homepage and want to install the Rails framework via gem rails, we already encounter the first problem. No libraries for Ruby can be installed due to missing authorizations. Now we could come up with the idea to install the libraries as superuser with sudo. Unfortunately, this solution is only temporary and prevents the libraries from being found correctly later in the development environment. It is better to create a folder for the GEMs in the user’s home directory and make this available via a system variable.
The above line must be entered at the end of the .bashrc file so that the changes remain persistent. It is important that is <user> replaced with the correct user name. The success of this action can be checked via gem environment and should result in an output similar to the one below.
With this setting, Ruby GEMs can now be installed without difficulty. Let’s try this out right away and install the Ruby on Rails framework, which supports us in the development of web applications: gem install rails. This should now run without error messages and with the command rails -v we can see if we were successful.
In the next step we can now create a new Rails project. Here I use the example from the Ruby on Rails documentation and write in the bash: rails new blog. This creates a corresponding directory called blog with the project files. After we have changed to the directory, we still need to install all dependencies. This is done via: bundle install.
Here we encounter another problem. The installation cannot be completed because there seems to be a problem with the psych library. The real problem, however, is that there is no support for YAML files at the operating system level. This can be fixed very quickly by installing the YAML package.
sudo apt-get install libyaml-dev
The problem with psych in Ruby on Rails has existed for a while and has been solved with the YAML installation so that the bundle install command now also runs successfully. Now we are also able to start the server for the Rails application: bin/rails server.
ed@:~/blog$bin/railsserver=> BootingPuma=> Rails7.1.3.3applicationstartingindevelopment=> Run`bin/rails server --help`for more startup optionsPumastartinginsinglemode...* Puma version: 6.4.2 (ruby3.1.2-p20)("The Eagle of Durango")* Min threads: 5* Max threads: 5* Environment: development* PID: 12316* Listening on http://127.0.0.1:3000* Listening on http://[::1]:3000UseCtrl-Ctostop
Bash
If we now call up the URL http://127.0.0.1:3000 in the web browser, we see our Rails web application.
With these steps, we have now created a functioning Ruby environment on our system. Now it’s time to decide on a suitable development environment. If you only occasionally adapt a few scripts, VIM and Sublime Text are sufficient as editors. For complex software projects, a full IDE should be used, as this simplifies the work considerably. The best recommendation is the paid IDE RubyMine from JetBrains. If you support Ruby open source projects as a developer, you can apply for a free license.
A freely available Ruby IDE is VSCode from Microsoft. However, a few plugins have to be integrated first and VSCode is not very intuitive for my taste. Ruby integration for the classic Java IDEs Eclipse and NetBeans are quite outdated and can only be made to work with a great deal of effort.
With this we have already discussed all the important points that are necessary to set up a functioning Ruby environment on your own system. I hope that this little workshop has significantly lowered the entry barrier to learning Ruby. If you like this article, please like it and recommend it to your friends.
README files have a long tradition in software projects. These originally plain text files contained license information and instructions on how to compile the corresponding artifact from the source code or important notes on installing the program. There is no real standard how to build such a README file.
Since GitHub (acquired by Microsoft in 2018) started its triumphant march as a free code hosting platform for open source projects, there was quite early the function that the README file as the start page of the repository display. All that is required is to create a simple text file called README.md in the root directory of the repository.
In order to be able to structure the README files more clearly a possibility for a simple formatting was looked for. Quickly the markdown notation was chosen, because it is easy to use and can be rendered quite performant. Thus, the overview pages are easier to read for people and can be used as project documentation.
It is possible to link several such markdown files together as project documentation. So you get a kind of mini WIKI that is included in the project and also versioned via Git.
The whole thing became so successful that self-hosting solutions such as GitLab or the commercial BitBucket have also adopted this function.
Now, however, the question arises as to what content is best written in such a README file so that it also represents real added value for outsiders. The following points have become established over the course of time:
Short description of the project
Conditions under which the source code may be used (license)
How to use the project (e.g. instructions for compiling or how to include the library in own projects)
Who are the authors of the project and how to contact them
What to do if you want to support the project
Meanwhile, so-called badges (stickers) are very popular. These often reference external services such as the free Continuous Integration Server TravisCI. These help to assess the quality of the project.
On GitHub there are also various templates for README files. However, you also have to look a little at the actual circumstances of your own project and judge which information is really relevant for users. But such templates help a lot to find out if you might have missed a point.
The fact that pretty much every manufacturer of source control management server solutions has integrated the function to display the README.md file as the project start page for the code repository means that a README.me is also a useful thing for commercial projects.
Even if the syntax for markdown is easy to learn, it can be more comfortable to use a MARKDOWN editor directly for extensive editing of such files. You should make sure that the preview is displayed correctly and not only a simple syntax highlighting is offered.
In any case, it is worth taking a look at the GitHub page https://www.readme-templates.com. Further resources on the topic can be found here:
In the previous part of the article treasure chest, I described how the database connection for the TP-CORE library got established. Also I gave a insight to the internal structure of the ConfiguartionDO. Now in the second part I explain the ConfiguartionDAO and its corresponding service. With all this knowledge you able to include the application configuration feature of TP-CORE in your own project to build your own configuration registry.
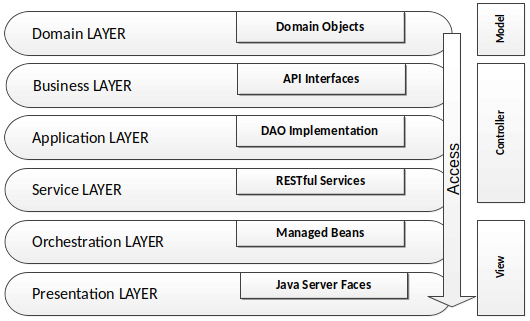
Lets resume in short the architectural design of the TP-CORE library and where the fragments of the features located. TP-CORE is organized as layer architecture as shown in the graphic below.
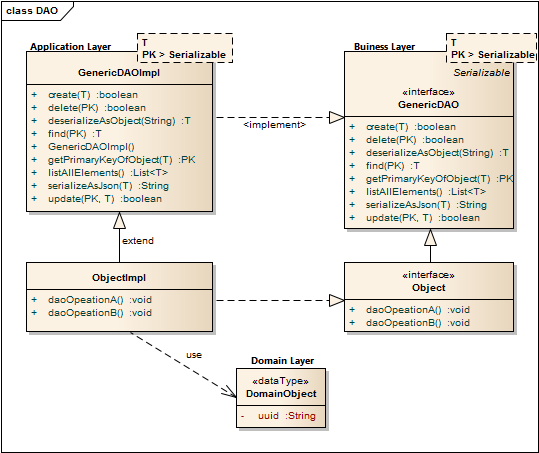
As you can see there are three relevant packages (layer) we have to pay attention. As first the business layer resides like all other layers in an equal named package. The whole API of TP-CORE is defined by interfaces and stored in the business layer. The implementation of the defined interfaces are placed in the application layer. Domain Objects are simple data classes and placed in the domain layer. Another important pattern is heavily used in the TP-CORE library is the Data Access Object (DAO).
Now the days micro services and RESTful application are state of the art. Especially in TP-CORE the defined services aren’t REST. This design decision is based on the mind that TP-CORE is a dependency and not a standalone service. Maybe in future, after I got more feedback how and where this library is used, I could rethink the current concept. For now we treat TP-CORE as what it is, a library. That implies for the usage in your project, you can replace, overwrite, extend or wrap the basic implementation of the ConfigurationDAO to your special necessities.
To keep the portability of changing the DBMS Hibernate (HBM) is used as JPA implementation and O/R mapper. The Spring configuration for Hibernate uses the EntityManager instead of the Session, to send requests to the DBMS. Since version 5 Hibernate use the JPA 2 standard to formulate queries.
As I already mentioned, the application configuration feature of TP-CORE is implemented as DAO. The domain object and the database connection was topic of the first part of this article. Now I discuss how to give access to the domain object with the ConfigurationDAO and its implementation ConfigurationHbmDAO. The domain object ConfigurationDO or a list of domain objects will be in general the return value of the DAO. Actions like create are void and throw just an exception in the case of a failure. For a better style the return type is defined as Boolean. This simplifies also writing unit tests.
Sometimes it could be necessary to overwrite a basic implementation. A common scenario is a protected delete. For example: a requirement exist that a special entry is protected against a unwanted deletion. The most easy solution is to overwrite the delete whit a statement, refuses every time a request to delete a domain object whit a specific UUID. Only adding a new method like protectedDelete() is not a god idea, because a developer could use by accident the default delete method and the protected objects are not protected anymore. To avoid this problem you should prefer the possibility of overwriting GenericDAO methods.
As default query to fetch an object, the identifier defined as primary key (PK) is used. A simple expression fetching an object is written in the find method of the GenericHbmDAO. In the specialization as ConfigurationHbmDAO are more complex queries formulated. To keep a good design it is important to avoid any native SQL. Listing 1 shows fetch operations.
The readability of these few lines of source is pretty easy. The query we formulated for getAllConfigurationSetEntries() returns a list of ConfigurationDO objects from the same module whit equal version of a configSet. A module is for example the library TP-CORE it self or an ACL and so on. The configSet is a namespace that describes configuration entries they belong together like a bundle and will used in a service like e-mail. The version is related to the service. If in future some changes needed the version number have increase. Lets get a bit closer to see how the e-mail example will work in particular.
We assume that a e-mail service in the module TP-CORE contains the configuration entries: mailer.host, mailer.port, user and password. As first we define the module=core, configSet=email and version=1. If we call now getAllConfigurationSetEntries(core, 1, email); the result is a list of four domain objects with the entries for mailer.host, mailer.port, user and password. If in a newer version of the email service more configuration entries will needed, a new version will defined. It is very important that in the database the already exiting entries for the mail service will be duplicated with the new version number. Of course as effect the registry table will grow continual, but with a stable and well planned development process those changes occur not that often. The TP-CORE library contains an simple SMTP Mailer which is using the ConfigurationDAO. If you wish to investigate the usage by the MailClient real world example you can have a look on the official documentation in the TP-CORE GitHub Wiki.
The benefit of duplicate all existing entries of a service, when the service configuration got changed is that a history is created. In the case of update a whole application it is now possible to compare the entries of a service by version to decide exist changes they take effect to the application. In practical usage this feature is very helpful, but it will not avoid that updates could change our actual configuration by accident. To solve this problem the domain object has two different entries for the configuration value: default and configuration.
The application configuration follows the convention over configuration paradigm. Each service need by definition for all existing configuration entries a fix defined default value. Those default values can’t changed itself but when the value in the ConfigurationDO is set then the defaultValue entry will ignored. If an application have to be updated its also necessary to support a procedure to capture all custom changes of the updated configuration set and restore them in the new service version. The basic functionality (API) for application configuration in TP-CORE release 3.0 is:
The following listing gives you an idea how a implementation in your own service could look like. This snipped is taken from the JavaMailClient and shows how the internal processing of the fetched ConfigurationDO objects are managed.
privatevoidprocessConfiguration(){ListconfigurationEntries=configurationDAO.getAllConfigurationSetEntries("core",1,"email");for(ConfigurationDOentry: configurationEntries){Stringvalue;if(StringUtils.isEmpty(entry.getValue())){ value =<strong>entry.getDefaultValue</strong>();}else{ value =<strong>entry.getValue</strong>();}if(entry.getKey().equals(cryptoTools.calculateHash("mailer.host",HashAlgorithm.SHA256))){configuration.replace("mailer.host", value);}elseif(entry.getKey().equals(cryptoTools.calculateHash("mailer.port",HashAlgorithm.SHA256))){configuration.replace("mailer.port", value);}elseif(entry.getKey().equals(cryptoTools.calculateHash("user",HashAlgorithm.SHA256))){configuration.replace("mailer.user", value);}elseif(entry.getKey().equals(cryptoTools.calculateHash("password",HashAlgorithm.SHA256))){configuration.replace("mailer.password", value);}}}
Java
Another functionality of the application configuration is located in the service layer. The ConfigurationService operates on the module perspective. The current methods resetModuleToDefault() and filterMandatoryFieldsOfConfigSet() already give a good impression what that means.
If you take a look on the MailClientService you detect the method updateDatabaseConfiguration(). May you wonder why this method is not part of the ConfigurationService? Of course this intention in general is not wrong, but in this specific implementation is the update functionality specialized to the MailClient configuration. The basic idea of the configuration layer is to combine several DAO objects to a composed functionality. The orchestration layer is the correct place to combine services together as a complex process.
Resume
The implementation of the application configuration inside the small library TP-CORE allows to define an application wide configuration registry. This works also in the case the application has a distribute architecture like micro services. The usage is quite simple and can easily extended to own needs. The proof that the idea is well working shows the real world usage in the MailClient and FeatureToggle implementation of TP-CORE.
I hope this article was helpful and may you also like to use TP-CORE in your own project. Feel free to do that, because of the Apache 2 license is also no restriction for commercial usage. If you have some suggestions feel free to leave a comment or give a thumbs up.
Through the years, different techniques to storage configuration settings for applications got established. We can choose between database, property files, XML or YAML, just to give a few impressions of the options we could choose from. But before we jumping into all technical details of a possible implementation, we need to get a bit familiar of some requirements.
Many times in my professional life I touched this topic. Problems occur periodically after an application was updated. My peak of frustration, I reached with Windows 10. After every major update many settings for security and privacy switched back to default, apps I already uninstalled messed up my system again and so on. This was reasons for me to chose an alternative to stop suffering. Now after I switched to Ubuntu Mate I’m fine, because those problems got disappear.
Several times I also had to maintain legacy projects and needed to migrate data to newer versions. A difficult and complex procedure. Because of those activities I questioned myself how this problem could handled in a proper way. My answer you can find in the open source project TP-CORE. The feature application configuration is my way how to avoid the effect of overwriting important configuration entries during the update procedure.
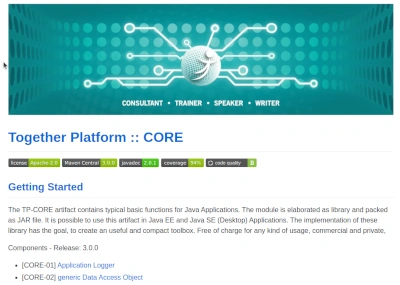
TP-CORE is a free available library with some useful functionality written in Java. The source code is available on GitHub and the binaries are published on Maven Central. To use TP-CORE in your project you can add it as dependency.
The feature of application configuration is implemented as ConfigurationDAO and use a database. My decision for a database approach was driven by the requirement of having a history. Off course the choice have also some limitations. Obviously has the configuration for the database connection needed to be stored somewhere else.
TP-CORE use Spring and Hibernate (JPA) to support several DBMS like PostgreSQL, Oracle or MariaDB. My personal preference is to use PostgreSQL, so we can as next step discuss how to setup our database environment. The easiest way running a PostgreSQL Server is to use the official Docker image. If you need a brief overview how to deal with Docker and PostgreSQL may you like to check my article: Learn to walk with Docker and PostgreSQL. Below is a short listing how the PostgreSQL container could get instantiated in Docker.
May you need to make some changes on the listing above to fit it for your system. After your DBMS is running well we have to create the schemata and the user with a proper password. In our case the schema is called together. the user is also called together and the password will be together too.
To establish the connection from your application to the PostgreSQL DBMS we use a XML configuration from the Spring Framework. The GitHub repository of TP-CORE contains already a working configuration file called spring-dao.xml. The Spring configuration includes some other useful features like transactions and a connection pool. All necessary dependencies are already included. You just need to replace the correct entries for the connection variables:
In the next step you need to tell your application how to instanciate the Spring context, using the configuration file spring-dao.xml. Depending on your application type you have two possibilities. For a standard Java app, you can add the following line to your main method:
The creation of the database table will managed by Hibernate during the application start. When you discover the GitHub repository of the TP-CORE project you will find in the directory /src/main/filters the file database.properties. This file contains more connection strings to other database systems. In the case you wish to compile TP-CORE by your own, you can modify database.properties to your preferred configuration. The full processed configuration file with all token replacements you will find in the target directory.
In the next paragraph we will have a closer look on the Domain Object ConfigurationDO
The most columns you see in the image above, is very clear, for what they got used. As first point we need to clarify, what makes an entry unique? Of course the UUID as primary key fits this requirement as well. In our case the UUID is the primary key and is auto generated by the application, when a new row will created. But using in an application all the time a non human readable id as key, to grab a value is heavily error prone and uncomfortable. For this use case I decided a combination of configuration key, module name and service version to define a unique key entry.
To understand the benefit of this construction I will give a simple example. Imagine you have functionality of sending E-Mails in your application. This functionality requires several configuration entries like host, user and password to connect with an SMTP server. to group all those entries together in one bundle we have the CONFIG_SET. If your application deals with an modular architecture like micro services, it could be also helpful to organize the configuration entries by module or service name. For this reason the MODULE_NAME was also included into this data structure. Both entries can be used like name spaces to fetch relevant information more efficient.
Now it could be possible that some changes of the functionality create new configuration entries or some entries got obsolete. To enable a history and allow a backward compatibility the data structure got extended by SERVICE_VERSION.
Every entry contains a mandatory default value and an optional configuration value. The application can overwrite the default value by filling the configuration value field. This allows updates without effect the custom configuration, as long the developer respect to not fill entries for configuration values and always use the default entry. This definition is the convention over configuration paradigm.
The flags deprecated and mandatory for a configuration key are very explicit and descriptive. Also the column comment don’t need as well any further explanation.
If there are changes of one or more configuration entries for a service, the whole configuration set has to be duplicated with the new service version. As example you can have a look on the MailClient functionality of TP-CORE how the application configuration is used.
A very important information is that the configuration key is in the DBMS stored as SHA-512 hash. This is a simple protection against a direct manipulation of the configuration in the DBMS, outside of the application. For sure this is not a huge security, but minimum it makes the things a bit uncomfortable. In the application code is a human readable key name used. The mapping is automatic, and we don’t need to worry about it.
Resume
In this first part I talked about why I had need my own implementation of a application registry to storage configuration settings. The solution I prefer is using a database and I showed how enable the database configuration in your own project. Shortly we also had a view on the data structure and how the Domain Object is working.
As an IT service provider, we often have to support our clients to reinstall old Windows systems. The most often challenge we have to face by this activity is to backup old files and restore them on the new system. Not only private persons, also companies using the email client Thunderbird. So we decided to publish this short guide how your Thunderbird profile can be backup and restore. To prevent a data loss – you should do backups regularly in the case your hardware or operating system got fully crashed.
backup
Connect an pen drive or hard disk (USB medium) on your computer.
Create a directory of your choice on the USB medium to back up your profile. Choose a name you are able to recognize later the content. (e.g. 2022-01-19_Thunderbird-profile)
Keep the „Explorer window“ open and make sure, that the directory is active.
Open Thunderbird on the computer you want to backup.
To find the old profile, click on the “three bars” in the top right-hand corner.
In the next windows that opens, click on the „Open Folder“.
A new “Explorer window” pop up and shows you all the files in your profile.
Mark all files by clicking – click on the “1st file”, then hold down the <Shift> key on your keyboard and at the same time press the “Arrow down” key until the grey „scroll bar“ in the window reaches the bottom. Once all files are selected (marked in blue), click with the “right mouse button” on any file and select the menu item “Copy“.
Go back to your other “Explorer window“, click the right mouse button and then “Paste“.
Once the copying process is complete, you can close your Thunderbird.
restore
Connect your „USB medium“ to the computer (destination) where you like to transfer your Thunderbird profile.
Open the “Explorer” and create the following directories: „Data“ ➡️ „ Thunderbird“ ➡️ „Post-Office xxx“ (C:\Data\Thunderbird\Post-Office xxx\ „xxx“ you need to replace for your Thunderbird profile name)
Hence your directories are created you can copy your profile data from your USB medium into the newly created directory „Post-Office xxx“.
After completing the copying process, you still need to set up your new profile directory in Thunderbird.
Press the keys <Windows Key>+<R> on your keyboard. The “Run” dialogue opens. Enter the following command: thunderbird -p as you can see in the screenshot and press “OK“.
In the newly opened Popup “Thunderbird – Choose User Profile“, click on “Create Profile…” to start the wizard.
In the 1st window of the “Profile Wizard – Welcome” click on “Next“.
In the 2nd window of the “Profile Wizard – Finish” enter the “Profile Name” (Post-Office xxx) under “1” you can see in the screenshot. Under “2” select the profile path by clicking on “Choose Folder“. (C:\Data\Thunderbird\Post-Office xxx)”.
To finish the process,you just have to press the “Finish” button.
You can now start Thunderbird normally from the start bar – all your emails & settings are restored. If you have questions or suggestions you can write us an e-mail or leave a comment. If you like this guide feel free to share this article
Cookie Consent
[EN] We use cookies to improve your experience on our site. By using our site, you consent to cookies.
[DE] Wir verwenden Cookies, um Ihre Erfahrungen auf unserer Website zu verbessern. Durch die Nutzung unserer Website stimmen Sie Cookies zu.
This website uses cookies
Websites store cookies to enhance functionality and personalise your experience. You can manage your preferences, but blocking some cookies may impact site performance and services.
Essential cookies enable basic functions and are necessary for the proper function of the website.
Name
Description
Duration
Cookie Preferences
This cookie is used to store the user's cookie consent preferences.
30 days
These cookies are needed for adding comments on this website.
Name
Description
Duration
comment_author
Used to track the user across multiple sessions.
Session
comment_author_email
Used to track the user across multiple sessions.
Session
comment_author_url
Used to track the user across multiple sessions.
Session
These cookies are used for managing login functionality on this website.
Name
Description
Duration
wordpress_logged_in
Used to store logged-in users.
Persistent
wordpress_sec
Used to track the user across multiple sessions.
15 days
wordpress_test_cookie
Used to determine if cookies are enabled.
Session
Statistics cookies collect information anonymously. This information helps us understand how visitors use our website.
Matomo is an open-source web analytics platform that provides detailed insights into website traffic and user behavior.


![jConf Peru 2021 [2]](https://elmar-dott.com/wp-content/uploads/2021-JCONF-Peru-Deploy-MVN-Central.webp)